Latest News and Posts from the V8 Speed and Resto Shop › Forums › V8 Forum – Car Enthusiasts Playground › V8 Speed and Resto Shop Car Builds › 1968 Oldsmobile 442 GM LSA Connect and Cruise Driveline Swap
- This topic has 26 replies, 5 voices, and was last updated 3 years, 6 months ago by Craig Forman.
-
AuthorPosts
-
05/11/2015 at #5834V8 StaffKeymaster
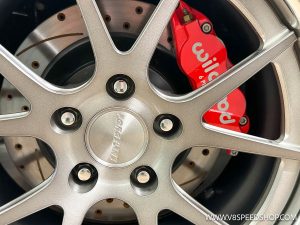
This very nice 1968 Oldsmobile 442 is wearing a crisp restoration and features some modified parts intended to give this car better handling and drivability. It’s not a numbers-matching W30 car, although it looks like one. It’s got 17” American Racing wheels, Wilwood brakes with a Hydratech hydraulic brake assist unit, Hotchkis control arms and sway bars, and a few other goodies. It’s powered by a big block Olds engine, but the owner wanted increased reliability, as he drives this car on cross country trips. His solution is a GM LSA supercharged 6.2 liter V8 “Connect & Cruise Kit” which also provides an overdrive transmission. It’s not an Oldsmobile engine, but the owner has several other numbers matching 442 W30 cars, and this one is not a “numbers car”, and he likes the technology and abilities of the LSA engine and the 4L85E transmission.
Under the hood, it appears all stock, but it is actually a big-displacement Olds with a stroker kit installed. It ran well, but didn’t really make much power.
Soon, one of these will be living between the red fenderwells.
06/11/2015 at #5893V8 StaffKeymasterWe ran this car on a chassis dyno before any work started. The Oldsmobile V8 drove well, but it did not make very much power. Our dyno session showed just over 224 hp to the rear wheels at an anemic 4100 RPM. The owner later revealed that this is a low compression engine that was built to be reliable on long drives, and not to win races. The 556 hp LSA is going to change all that.
06/17/2015 at #5906Jon ShieldsParticipant06/17/2015 at #5912V8 StaffKeymaster06/18/2015 at #5918Mike ClarkeKeymaster06/18/2015 at #5921V8 StaffKeymaster06/18/2015 at #5922V8 StaffKeymasterWe elected to install a Holley LS conversion oil pan to gain better fit at the crossmember, and also to increase ground clearance.
The Muscle Rods frame stands and engine mount plates allowed us to drop the LSA into place with minimal drama.
We were concerned about how the transmission was going to fit under the stock floor. However, we used the Muscle Rods install kit and the 4L80e transmission fit snugly without major floor modifications.
However, we checked the pinion angle and learned that the nose of the engine was high and the tail of the transmission was low, so we elected to modify the frame stands to bring the crank centerline down.
We elected to cut and remove a slice of the engine mount, and this modification netted us a 4° angle on the engine and transmission, nearly ideal for a street driven car. Here, the mount is just tack welded in place for test fitting.
07/07/2015 at #5989V8 StaffKeymasterThe Oldsmobile 12-bolt rear axle assembly was swapped in favor of a new Moser Engineering Chevrolet 12-bolt rear end. This one is loaded with a Detroit Tru-Trac limited-slip differential, 31 spline axles, and a new 3.73:1 gear ratio.
The Moser units come ready to paint and install. Note the clean gear wear pattern on the ring & pinion; this one should be a nice and quiet setup.
This is an all-new housing, and the axle ends are Tornio-style with big bearings and a bolt pattern to match our existing Wilwood brakes.
07/07/2015 at #5990V8 StaffKeymaster09/26/2015 at #6458V8 StaffKeymasterThe crew installed the housing under the Olds, re-using the existing Hotchkis suspension system.
We had a new driveshaft made to accommodate the 4L80E output spline and the 1350-style universal joint on the 12-bolt pinion yoke. Here, you can see the reconnected emergency brake lines connected to the transmission crossmember.
The GForce transmission crossmember provides clearance for the exhaust.
Sharp eyes will note that this car is riding on a fully-boxed convertible frame for added stiffness.
09/26/2015 at #6459V8 StaffKeymasterThe 12-bolt cover reinstalled. We will have to do some exhaust work to connect the existing system to the new headers and engine.
Adam TIG welded some new flanges to the existing X-pipe to make the system fit. Once completed, it will be sent to Jet-Hot for coating.
The LSA requires the use of an electronic engine management system, which is supplied in the connect and cruise kit.
This customer is not concerned with the electronics being visible, so we mounted the ECM on a custom bracket inside the passenger fender well.
A custom air intake tube feeds the LSA, shown here in the paint booth before turning black.
The painted intake tube.
One of the challenges of installing a supercharged LS engine into a Muscle Car is the belt drive system. On this car, we were one of the first customers of the GM “Modified” LSA front-drive system, which elevates the alternator for better clearance over the steering box. It’s part number 19303242.
However, this rig does not account for the air conditioning compressor, so we used a bracket made by a friend of ours who recently made some extras for his ‘66 Chevelle LSA project. You can see it down near the front of the engine on the passenger side.
Here you can see the tab we made to mount the plastic power steering reservoir.
10/12/2015 at #6560V8 StaffKeymasterOne of the challenges of a strong running supercharged engine is keeping the air intake charge cool. This LSA engine has a water to air intercooler installed between the supercharger and the intake manifold, which requires a circulating flow of coolant.
The Cadillac CTS-V and Camaro ZL1 use a small heat exchanger behind the grille, which has been found to be marginally effective in reducing the intake air charge temperature.
In this installation, we chose to install a much larger heat exchanger from C&R Racing. Another this heat exchanger also has mounting tabs to cleanly attach an air conditioning condenser coil.
Although it was designed for an “F” body platform – Camaro / Firebird – our team modified some mounting brackets to install it in the “A” car.
Our crew built some custom brackets to install the heat exchanger and the A/C the condenser coil in the nose behind the grill. This required modifying the hood latch support bracket considerably. They also mounted the upgraded supercharger coolant pump down low, as not to obstruct the airflow across these three coolers.
01/22/2016 at #7162V8 StaffKeymaster01/22/2016 at #7163V8 StaffKeymasterWe stated earlier that the floor didn’t require “major modifications”, but it did require some massaging. Once the exhaust was out, we pulled the transmission to touch-up the floor where required.
We lifted the engine to complete the final welding on the engine mounts, now that we were happy with the fit. We also took some time to tidy up the wiring and make the plumbing for the fuel system.
01/22/2016 at #7164V8 StaffKeymasterWe’re using an Entropy radiator designed for LS swaps into GM “A” bodies. This unit features dual fans and is rated to cool engines up to 750 HP.
The C&R heat exchanger just before the radiator was installed.
Tidying up the wiring and plumbing behind the grille. THe brackets have all been painted black at this point.
Here, the heat exchanger pump, the A/C, and the cooling lines are all coming together.
-
AuthorPosts
- You must be logged in to reply to this topic.