One area of Muscle Car performance that remains tricky is the braking system. Sometimes, even cars equipped with upgraded brakes don’t stop as well as you want them to. We found a solution to this problem and a couple others in the form of a Hydroboost brake booster.
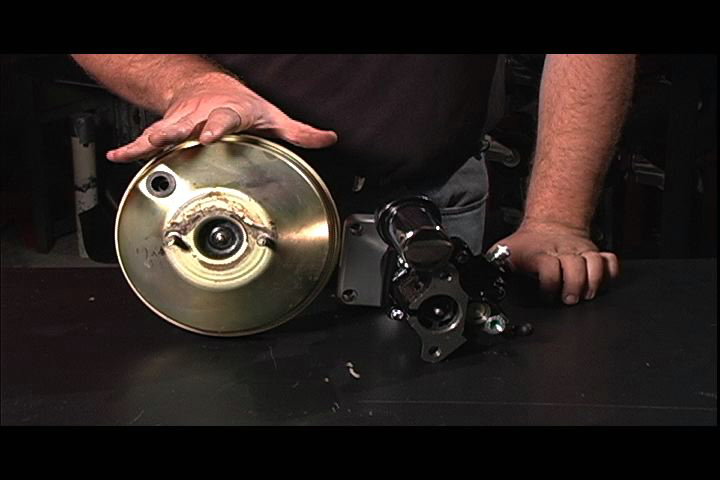
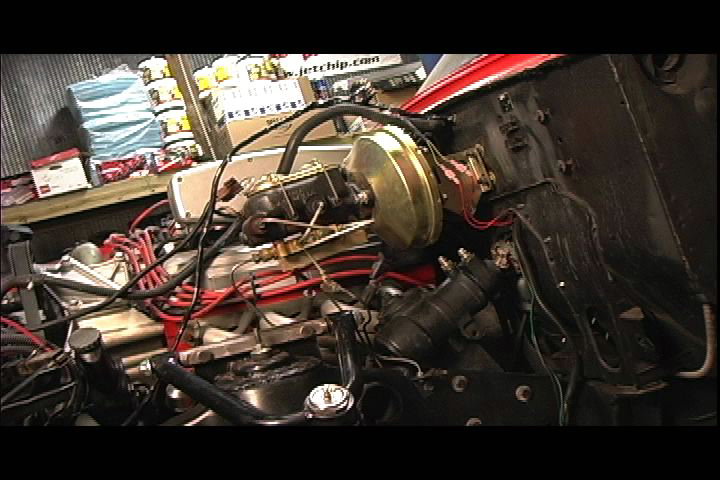
There are three main reasons to install a hydroboost system. The first is if your high-performance engine does not create enough vacuum to operate the power brakes with a traditional vacuum brake booster. The next reason is clearance – some engine swaps simply do not have the room between the valve cover and the brake booster. Check the difference between the vacuum unit on the left and the Hydroboost on the right.
But perhaps the best reason is increased brake performance. Let’s look at what a Hydroboost unit is, and then we’re going to install a Hydroboost brake booster from Hydratech on our 1962 Ford, but the installation applies to most Muscle Cars.
How To Install a Hydratech Hydraulic Brake Booster on our 1962 Galaxie Video Install Part 1

A brake booster is basically a mechanical device that helps add more force to the brake pedal when you hit the brakes. Vacuum boosters use stored engine vacuum to help the pedal down while you push with your foot. These work well if they are in proper order and if the engine makes enough vacuum to run them. Sometimes longer duration camshafts with lots of overlap bleed off vacuum before the booster can store it up. An add on solution is a vacuum pump, but then you need to have the pump buzzing all the time making vacuum.
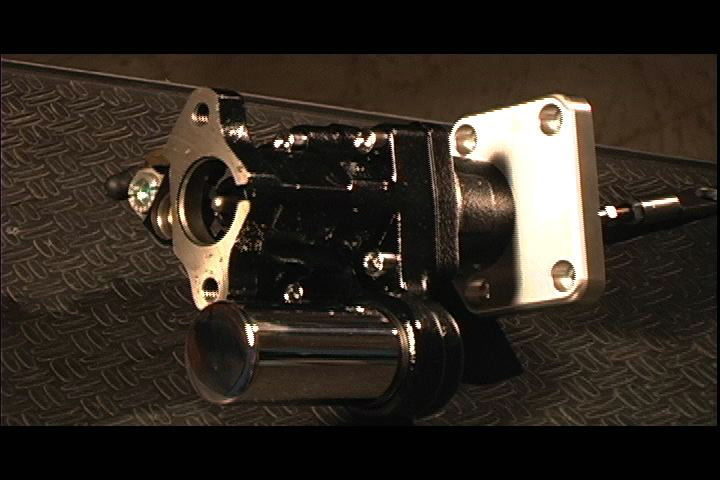
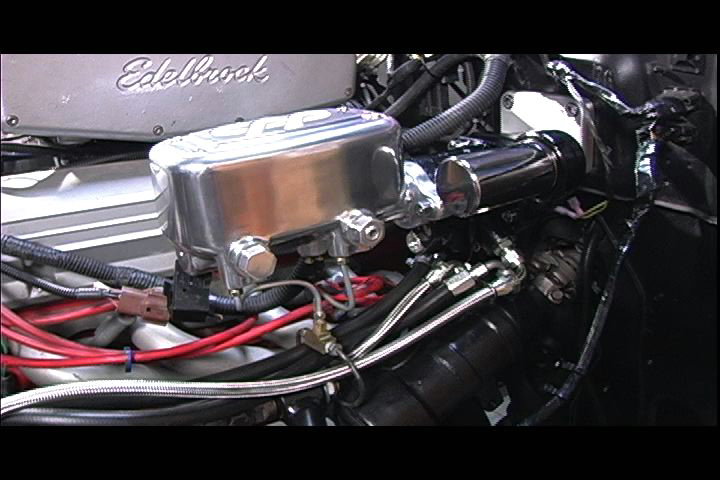
The Hydroboost booster uses hydraulic pressure built up by the power steering pump to assist the brake action. Hydraulic pressure is far greater than vacuum, and the action is nice and smooth giving precise braking control. Plus, the hydroboost unit is very small, allowing you to install it in tight engine compartments. This Hydratech unit is brand new, and they supply all the fittings, brackets, and hoses you’ll need to install it. The shiny unit is an accumulator which stores up fluid for multiple stops with the engine off.
Some installations may not require the removal of any brake lines, but in our case, we’re also upgrading to a trick new master cylinder and proportioning valve combination unit from Classic Performance Products.
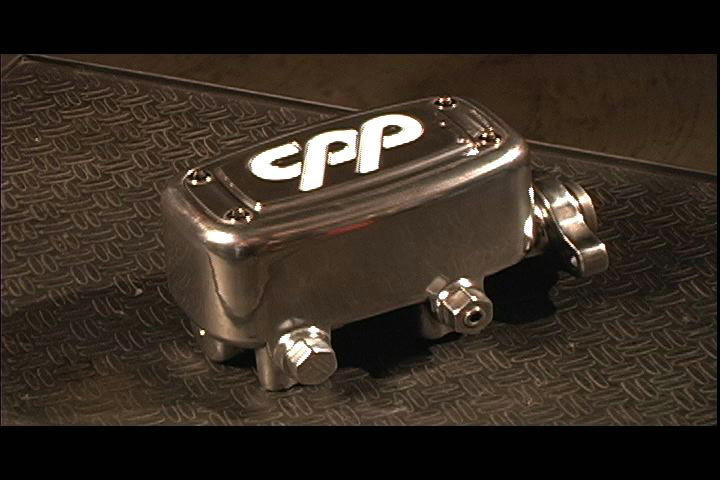
The Classic Performance Products MCPV-1 unit is a singular casting containing a disc brake master cylinder, a removable residual pressure valve for rear discs or drum brakes, a built-in proportioning valve to adjust front to rear brake bias, and a threaded port for a stop light switch. This one unit incorporates several traditional pieces of hardware, and any time you can reduce the number of brake connections, you reduce the chances for leaks. In our case, the stoplight switch is a great feature, because we have a complicated brake switch on the pedal that wasn’t right for this car and is unreliable.
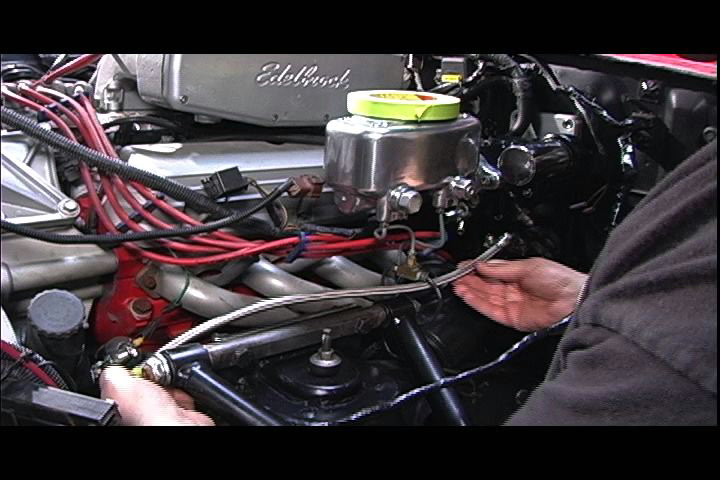
Our first step is to remove the master cylinder, combination valve, and brake lines from our car. Then we can remove the vacuum booster and the vacuum line from the engine. We won’t need that anymore. We’re going to re-route some of the brake lines to make things a little simpler under the hood. Always double-flare brake lines for safety.
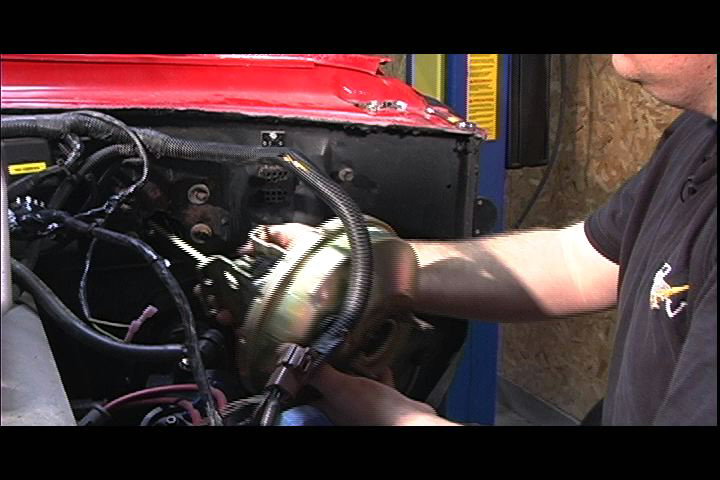
Mounting the Hydroboost unit is very straightforward.
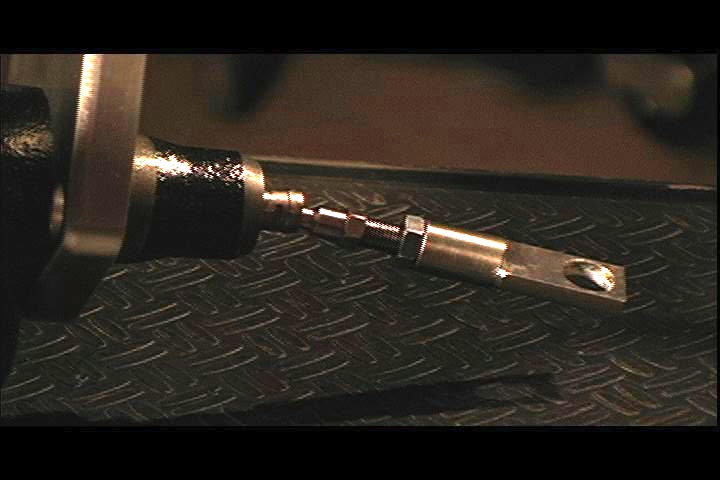
Hydratech supplied an adjustable billet clevis mechanism that attaches to the brake pedal and allows you to set the height you’re comfortable with. Then you simply bolt the hydroboost unit to the firewall using Hydratechís bracket. They have these for a wide variety of muscle cars, as well as some universal applications to fit just about anything.
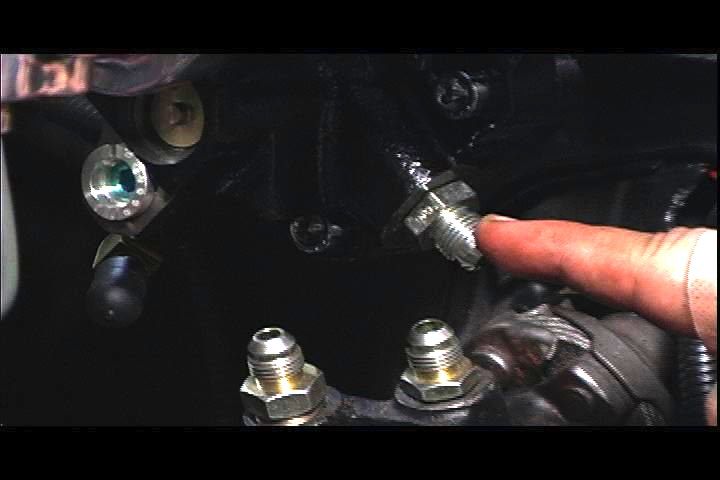
Next, you’re going to have to determine the placement of the hydraulic lines for the booster unit. Hydratech supplies the fittings and hoses to custom make your lines. The first high-pressure line comes from the power steering pump and goes to the booster. Next, the second high-pressure line runs back to the power steering pump from the booster. Finally, a low-pressure return line runs back to the power steering reservoir from the booster.
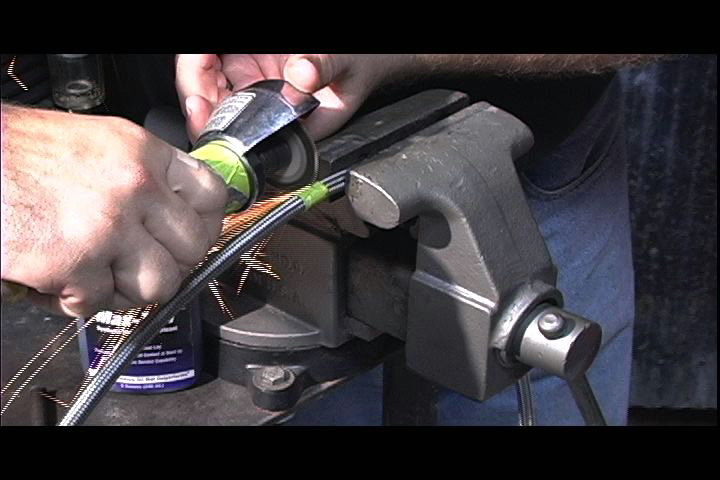
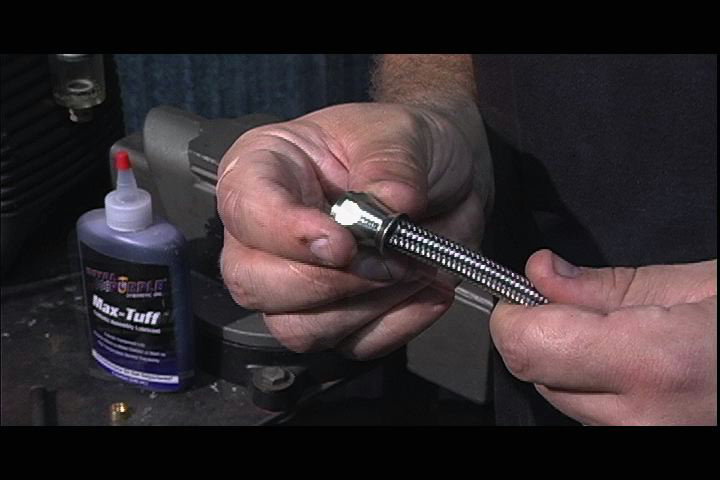
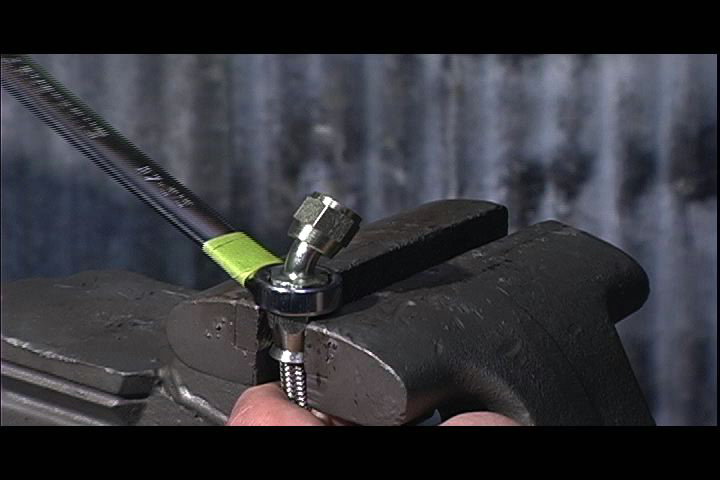
Once you have your route planned, you can make your hose ends and install the hoses. Hydratech includes high-quality Aeroquip TEFLON lined hoses and the correct ends to put ’em together properly.
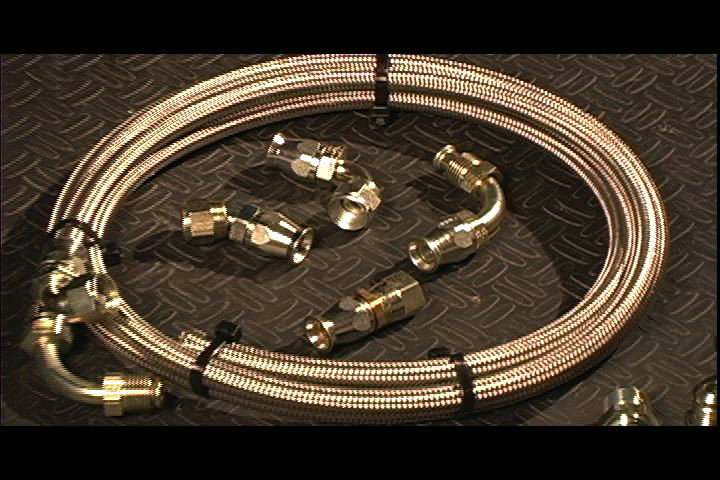
Hydratech supplies great instructions to do these, but here’s the deal in a nutshell.. cut the hose with a cutoff wheel, slide the tightening nut / collar on, fray the stainless braiding apart, tap in the ferrule, open up the Teflon liner, lube up your hose end and tighten it down. It’s a little trickier than that, but not too much.
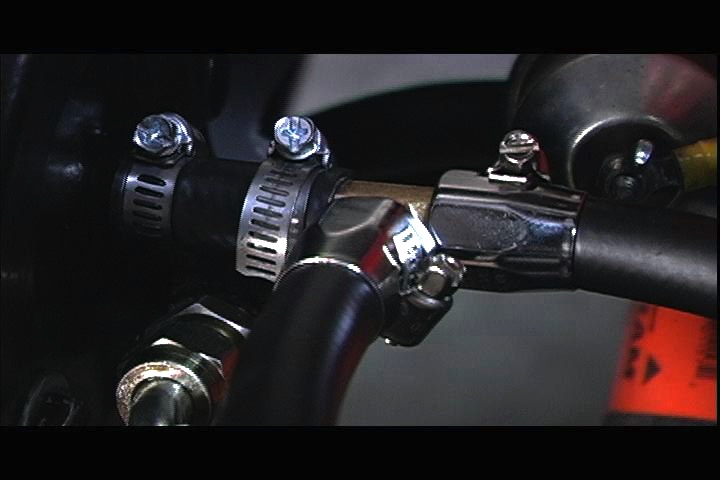
You have some options when it comes to the return line, you want to make sure the flow of fluid is a straight shot from the hydroboost unit, so make your tee fitting accordingly. You can also add a separate return fitting on the reservoir if you’d like. In this photo, the fluid path of the hose running straight through the tee fitting is from the Hydroboost, the path entering the tee at the 90 degree angle is from the power steering pump. It’s important to orient your lines as such to assure proper flow in the system.
Now we need to install the Classic Performance Products MCPV-1 master cylinder. We bench-bled the master cylinder to remove the bubbles from the unit, and now we have to connect the brake lines and stoplight switch wiring.
Once the whole brake system is reconnected, perform a complete system bleed to flush out air
bubbles and equip your brake system with fresh fluid.
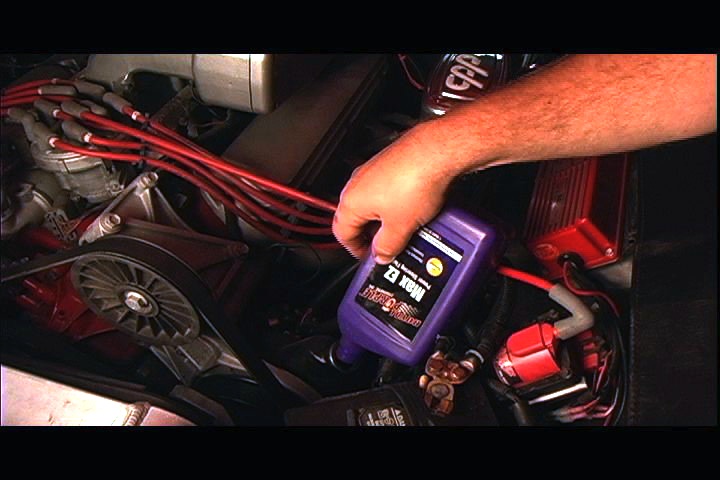
Now we can add the power steering fluid to our system. The process involves adding fluid, starting the car, adding more fluid, working the Wheels back and forth as well as the brake pedal up and down, adding more fluid, and repeating. You’ll have to do this several times to work the major air bubbles out of the system. We’re using Royal Purple MAX EZ synthetic steering fluid because it resists high-heat and high pressure situations better than organic fluid. It may take several weeks of driving to fully work all the bubbles out of your system, so check the fluid level often. The nice thing is that the brake pedal will feel firmer the more you drive!
Finally, we have to set the brake bias from front to rear using the built-in adjustable proportioning valve in the Classic Performance Products master cylinder. You’ll need to spend some time adjusting the valve for higher rear brake pressure and testing how it stops a few times to get it right, but donít blow this step off. All you have to do is turn this adjuster to dial in the rear brakes.
Once we finished our install, we checked the system for leaks and took our initial test drive. We lightly applied the brakes to test their operation, and we could tell immediately that there was a monumental improvement in braking power. The Hydratech hydroboost system clamps the rotors with ease, and the pedal operation is smooth and linear. Our car now has the ability to lock the Wheels with ease should the situation arise. The pedal is very controllable, and we now have new confidence in our ride, which translates to a much more enjoyable driving experience.

The Hydratech hydroboost install has been one of the best improvements we’ve made to our car, and we cannot recommend Hydratech enough. They supplied all the right parts and a unit that does exactly what they claimed it would do. We won’t build another car without one.
https://www.hydratechbraking.com
DISCLAIMER: Demonstrations and procedures contained in the V8TV show or website may not provide all necessary or relevant information. Applicable local laws and regulations may vary and should be checked before any project is commenced. Be sure to follow all applicable safety procedures. The Men’s Channel and V8TV Productions, Inc. make no warranties, expressed or implied, as to the completeness, accuracy, or practicality of any such demonstration or procedure or any information with respect thereto contained in the preceding program.
© 2015 V8TV Productions, Inc.